In this chapter we'll discuss how to create your own Cocos2d-X project files from scratch for iOS, Mac, Android and Windows.
### RapidGame
You can skip this chapter if using [RapidGame][2]. Here's how easy it is to create a new game ([Node.js][3] and [Git][4] are required) using prebuilt cocos2dx libraries so you never have to compile cocos2d-x twice:
sudo npm install rapidgame -g
rapidgame create cocos2d "Zombie Matrix" org.myorg.zombiematrix
rapidgame prebuild
From here on we'll be showing you how to create a new project with cocos2d-x with all the source files ready to be compiled.
### What will you need to follow along?
First of all, you'll need to [download Cocos2d-X][6]. This tutorial is written for version 3. There's also an [older version][7] of this chapter maintained for version 2.
The iOS and Mac sections assert that you have a Mac computer and have already installed a stable release of [Xcode][8]. Xcode is a free development environment by Apple and much preferred by many a developer.
The Windows section asserts that you have a genuine copy of Windows with [Visual Studio][9] installed. You can accomplish this setup on a regular PC or use a Mac computer with [Boot Camp][10].
The Android section asserts that you have already installed the Android [SDK][11] (which includes [Eclipse][12]) and [NDK][13]. Make sure to install the latest platform-tools, build-tools and API from the Android SDK Manager. With this setup, you can build for Android on Windows, Mac or Linux.
Keep in mind that Xcode, Visual Studio, Eclipse and even Cocos2d-X are updated often. There are new options, build settings and sometimes UI elements have been rearranged. If you run into any problems, please let us know how you solved them in the comments.
According to a recent survey we took, iOS is the most popular deployment target for Cocos2d-X developers, with Android coming in a close second. So that's where we'll start.
### iOS Project From Scratch
There's now a very simple way to create a Cocos2d-X iOS project from scratch. Just open Terminal, change to your cocos2d-x directory and run the command to create a new multi-platform project:
cd Desktop/cocos2d-x-latest/
tools/cocos2d-console/bin/cocos new \
--package com.MyCompany.AwesomeGame \
--language cpp \
--directory ~/Desktop \
ZombieMatrix
We use the `cpp` language option here to create a C++ project. You can also create `lua` and `javascript` projects.

You've now got a brand-new, multi-platform game project called "MyGame" on your Desktop.
Open up `~/Desktop/MyGame/proj.ios_mac/MyGame.xcodeproj`. Select "MyGame iOS" from the scheme dropdown (it might say "build-all-libs Mac" initially) and hit the Run button to check out Cocos2d-X's HelloWorld app.

You probably noticed when you selected "MyGame iOS" from the schemes dropdown that there are many non-runnable schemes to choose from. You can hide all these non-runnable schemes. Just select "Manage Schemes..." from the scheme dropdown, uncheck the Show box next to all but "MyGame iOS" and "MyGame Mac" and click OK.

Alternatively, you can just remove the unwanted schemes by selecting them and clicking the "-" minus button.
### Xcode Sub-Projects
Let's take a look at the project behind the scenes. It's actually quite elegant.
First of all, Cocos2d-X is included as a [sub-project][16]. It makes available many different targets that can be built and included in your game. These include the cocos2dx library for iOS & Mac, the CocosDenshion sound engine for iOS & Mac, the Box2d & Chipmunk physics engines, and many other libraries.
These libraries are included in the MyGame project as dependencies and the resulting library files are linked into the binary. View this for yourself by clicking MyGame from the project drawer and then clicking Build Phases.

Building a project this way makes upgrading a snap. Since all the libraries are included as a single sub-project, when Cocos2d-X is upgraded the MyGame project does not have to be edited. Just copy the new Cocos2d-X into `MyGame/cocos2d` and that's it.
### Customizing the Project
Now let's customize the project a little bit. Open Classes/HelloWorldScene.cpp and change the following line:
auto label = LabelTTF::create("Hello World", "Arial", 24);
To this:
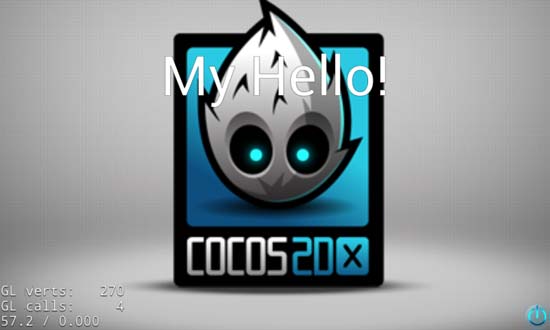
auto label = LabelTTF::create("My Hello!", "Arial", 80);
Now Build & Run your project:

The label now says "My Hello!" instead of "Hello World" and it's much bigger. You've successfully proven the project is your own.
### The Mac Project
One of the best parts about creating a meta-project like this is that it re-uses the same game source code for each platform. Because we changed that one line of code to "My Hello!" it will be applied to every other platform we build for. This is where Cocos2d-X really shines.
The Mac project is already a part of the iOS project that we've been working on. Just select "MyGame Mac" from the schemes dropdown and Build & Run. After it builds all of Cocos2d-X for Mac you'll see your "My Hello!" customization.

### The Android Command-line Project
Once again the meta-project comes in real handy. We already have an Android command-line project that we can customize in the `proj.android` folder.
You can see which Android API version it's targeted for in the `project.properties` file. Example:
target=android-10
This is the API version that will be built against (similar to the Base SDK in Xcode). Make sure you have installed this API version from the Android SDK Manager.
Your Android game can still run using earlier API versions, as specified in the `AndroidManifest.xml` file (similar to the Deployment Target in Xcode):
The `proj.android` folder is mostly ready to go. We just need to add a `makefile` for convenience. Open Terminal, switch to your `MyGame/proj.android` directory, and create this `makefile` (or just [download][17] it):
all:
@if [ ! -d \${ANDROID_HOME} ]; then echo "Missing ANDROID_HOME"; exit; fi
./build_native.py
ant -Dsdk.dir=/Path/to/your/android/sdk debug
run:
adb -d uninstall com.MyCompany.AwesomeGame
adb -d install bin/MyGame-debug.apk
adb -d logcat | grep cocos2d
clean:
rm -rf obj
rm -rf bin
rm -rf gen
rm -rf assets
rm -rf libs/armeabi
rm -rf libs/armeabi-v7a
rm -rf libs/x86
rm -rf libs/mips
Important: make sure to change the `/Path/to/your/android/sdk` on line 4 to match the path where you installed your Android SDK.
Now, while still in the `proj.android` directory, you can just run the `make` command to start building your Android APK file:

When the `make` command is done, you'll have `MyGame-debug.apk` ready in the `bin` subfolder.
Because it's a bit tricky to get OpenGL ES 2.0 (used by Cocos2d-X) to [work in the Android Emulator][18], I recommend attaching a real Android device via USB and running it that way.
Once you've attached your Android device via USB, just run the `make run` command, then tap on the MyGame app to run it. Here's a screenshot of it running on my Samsung Galaxy S:
### The Android Eclipse Project
Open up Eclipse and make sure you've got all the Android and C++ plugins installed. If you need some guidance getting Eclipse set up correctly, here's a [great tutorial][19].
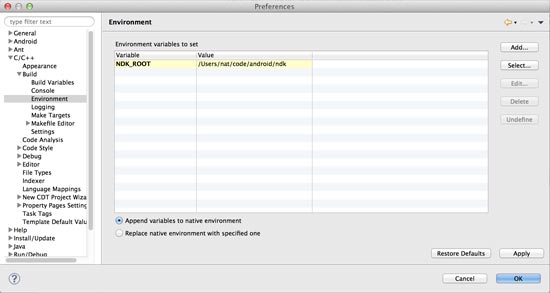
Follow the Eclipse instructions in `MyGame/proj.android/README.md`. There's a few things you'll need to setup to ensure Cocos2d-X compiles correctly. On Mac, you'll need to at least set the `NDK_ROOT` environment variable:
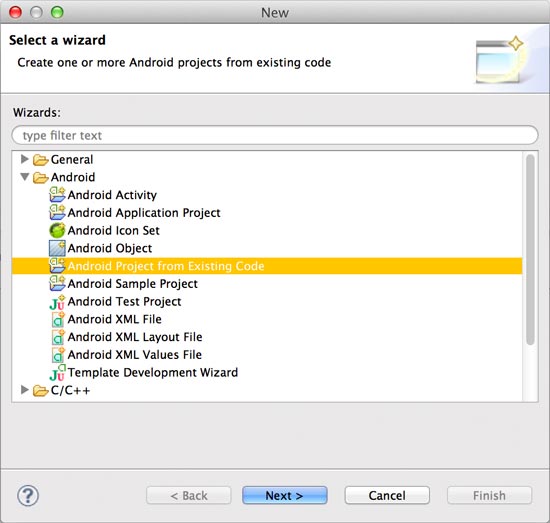
Now select File > New > Other... and choose "Android Project from Existing Code".
Next, choose your `MyGame/proj.android` folder with the Browse... button, make sure your project is selected and click Finish.

Last, repeat the same process to add an Android project from existing code and this time choose the `MyGame/cocos2d/cocos/platform/android/java` folder.

There you go. You've got a link to MyGame and libcocos2dx in the Package Explorer. Attach your device, select the MyGame project, then click the green Play button and Run As > Android Application.
If you get errors about @Override and "The method ___ must override a superclass method" then you've got to change your Java compiler compliance level to 1.6. Open Eclipse' preferences to Java > Compiler and select 1.6. Then click "Configure Project Specific Settings..." and do the same for your project.
Wondering where Eclipse stores project file data? It doesn't. Eclipse stores only [workspace data][20].
### The Windows Project
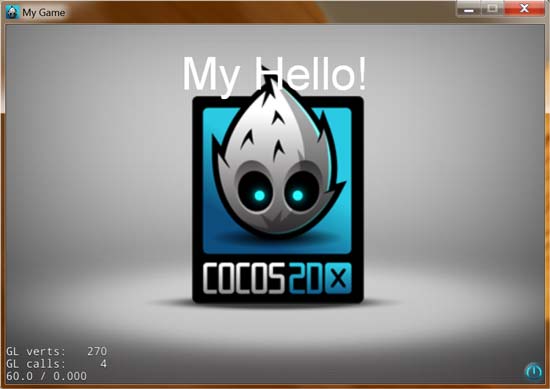
The first step here is to get the MyGame project onto a Windows system. Once you've done that, open up Visual C++ with `MyGame/proj.win32/MyGame.sln`. Next, click the green Play icon to Build and Start Debugging.
### Conclusion
By now you've gone through creating a Cocos2d-X meta-project that builds and runs on iOS, Mac, Android and Windows. Congratulations.
The exciting part about it all is that the same file, HelloWorldScene.cpp, drives most of the content for this little app. Changing that one line from saying "Hello World" to "My Hello!" worked on all those platforms without any further edits.
That's all for this chapter.
[1]: /game-source-code/cocos2d-x-platformer-engine/
[2]: //github.com/NatWeiss/RapidGame
[3]: //nodejs.org/download/
[4]: //git-scm.com/downloads
[5]: //github.com/NatWeiss/RapidGame/blob/master/README.md
[6]: //cocos2d-x.org/download
[7]: /book/cocos2d-x/project-setup-v2/
[8]: //developer.apple.com/xcode/
[9]: //www.visualstudio.com/downloads/download-visual-studio-vs
[10]: //support.apple.com/kb/HT1461
[11]: //developer.android.com/sdk/index.html
[12]: //www.eclipse.org/
[13]: //developer.android.com/tools/sdk/ndk/index.html
[14]: //www.crystax.net/en/android/ndk
[15]: //cocos2d-x.org/boards/6/topics/20138?r=20161
[16]: //www.cocoanetics.com/2011/12/sub-projects-in-xcode/
[17]: /assets/book/cocos2d-x/makefile
[18]: //www.cocos2d-x.org/boards/6/topics/12563
[19]: //www.raywenderlich.com/5527/getting-started-with-android-development
[20]: //forums.adobe.com/message/998187
[21]: /book/cocos2d-x/animation-spritesheets/