**[UPDATE]** There is now a [newer version][1] of this chapter based on Cocos2d-X 3. This older chapter is maintained in case anyone is still using version 2.
In this chapter we'll discuss how to create your own Cocos2d-X project files from scratch for iOS, Mac, Android and Windows.
### What will you need to follow along?
First of all, you'll need to [download Cocos2d-X][3].
The iOS and Mac sections assert that you have a Mac computer and have already installed a stable release of [Xcode][4]. Xcode is a free development environment by Apple and much preferred by many a developer.
The Windows section asserts that you have a genuine copy of Windows with [Visual Studio][5] installed. You can accomplish this setup on a regular PC or use a Mac computer with [Boot Camp][6].
The Android section asserts that you have already installed the Android [SDK][7] (which includes [Eclipse][8]) and [NDK][9]. With this setup, you can build for Android on Windows, Mac or Linux.
Note that the NDK we recommend installing is [Google's Android NDK][9]. We used to recommend the NDK from [CrystaX][10], but lately there have been some [issues with fopen][11].
Keep in mind that Xcode, Visual Studio, Eclipse and even Cocos2d-X are updated often. There are new options, build settings and sometimes UI elements have been rearranged. If you run into any significant snags, just be a go-getter, solve your riddle and let us all know the new answer in the comments.
According to a recent survey we took, iOS is the most popular deployment target for Cocos2d-X developers, with Android coming in a close second. So that's where we'll start.
### iOS Project From Scratch
There are two ways you can create a Cocos2d-X iOS project from scratch:
1. Install the Cocos2d-X templates, then do a New Project.
2. Make a copy of samples/HelloCpp, then open the project and rename.
We'll take a look at both methods.
### New iOS Project via Templates
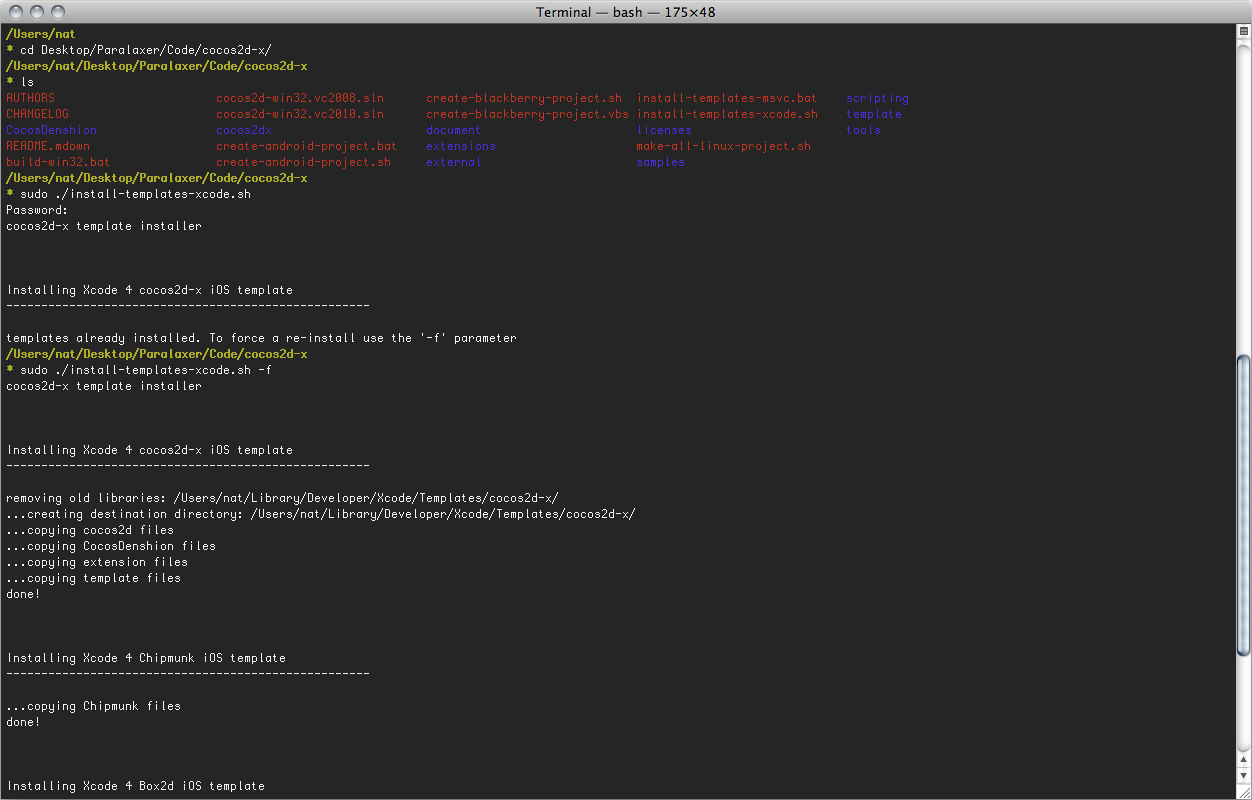
Cocos2d-X comes packaged with a script which installs Xcode project template files for iOS. Just open Terminal, change to your cocos2d-x directory and run the command to install the templates:
cd Desktop/Paralaxer/Code/cocos2d-x/
sudo ./install-templates-xcode.sh -f
Use `sudo` if you'd like the templates to be installed for all users.
Use the `-f` flag to automatically remove any existing Cocos2d-X template files and replace them with the newest.

Now that you've got the Xcode iOS templates installed, just open Xcode and create a New Project. You'll have the option of choosing one of the Cocos2d-X templates from the iOS category.
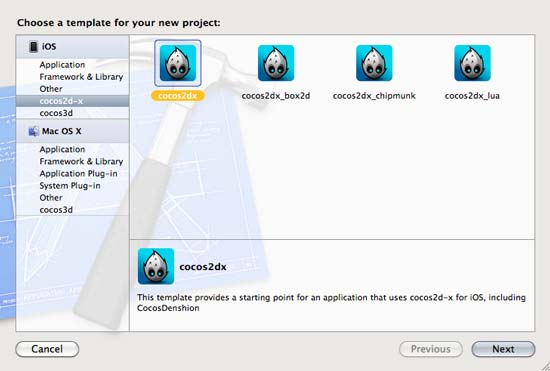
Choose one of the Cocos2d-X templates, give your project a name and save it somewhere. You've now got a brand new Cocos2d-X project. Hit the Run button to check out Cocos2d-X's HelloWorld app.

As of Cocos2d-X version 2.0.2, what you get is a neat, self-contained project folder. It contains all the Cocos2dx source code files in the `libs` subfolder.

This project builds Cocos2dx straight into your binary. In other words, it doesn't compile a static library and then link that into the final binary.
This way is good for customizing the Cocos2dx game engine, as you can edit CCCamera.cpp, for example, as you like. However, it makes upgrading your project to new versions of Cocos2d-X a bit of a hassle. You'l likely have to:
1. Copy a new version of the Cocos2d-X/cocos2dx folder into your libs folder.
2. Remove the existing cocos2dx project references from your Xcode project.
3. Restore them by adding the new cocos2dx folder to your project again.
4. Remove any unnecessary references (for example, the platform/blackberry folder).
5. Tune your build settings as necessary.
### Xcode Sub-Projects
The alternate way of creating a Cocos2d-X project is to have a reference to the cocos2dx project within your project. In other words, it's a project inside a project (or a [sub project][12]).
When creating a project like this, you've got to make the cocos2dx sub-project a Target Dependency and link your binary with its outputted library (e.g. libcocos2dx.a). See the Xcode screenshot below.
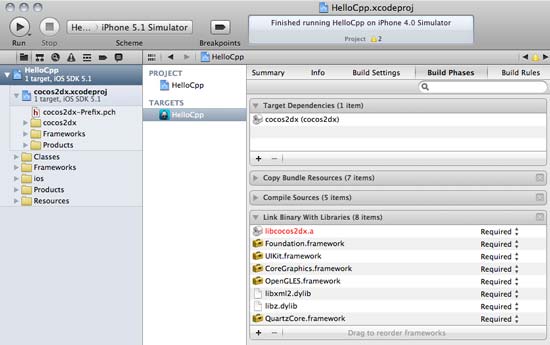
When Cocos2d-X is updated, this sub-project is also updated. Therefore, you don't have to update your original project to the new version of Cocos2d-X. It's a mostly maintenance-free affair.
By making a copy of the Cocos2d-X/samples/HelloCpp, we can start a project like this. The extra benefit of copying the HelloCpp project is that it is already organized for multiple platforms. There's proj.ios, proj.mac, proj.android and proj.win32 folders ready to go.
### New iOS Project via Copying
Here's the scoop on how to make a copy of HelloCpp:
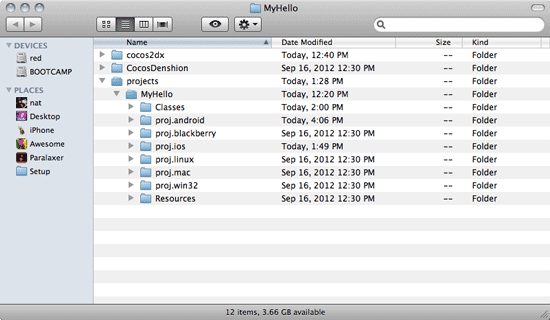
1. Make a new folder for your meta-project (e.g. Desktop/MyHello).
2. Copy `cocos2dx`, `CocosDenshion` and `samples/HelloCpp` from the main Cocos2d-X folder directly into your meta-project folder.
3. Rename the `samples` folder to `projects` and `HelloCpp` to `MyHello`.
You'll end up with a folder looking similar to this:
Now you can open projects/MyHello/proj.ios/HelloCpp.xcodeproj, click on the HelloCpp target and rename it to MyHello (or whatever you like).
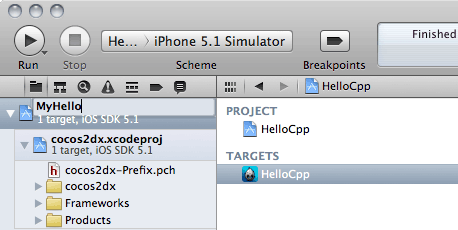
You'll be presented with a window with options to automatically rename everything in the project to MyHello. Click the Rename button to allow Xcode to do the renaming for you.

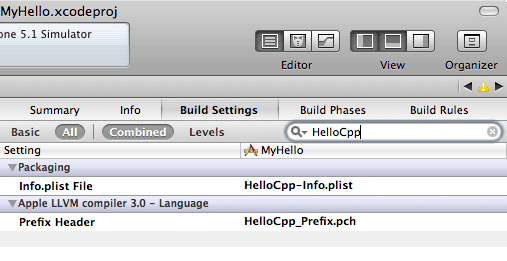
Note that my copy of Xcode 4.3 was unable to rename the Prefix.pch and Info.plist files. However, it's easy to do that yourself:
1. (Finder) Manually rename HelloCpp_Prefix.pch to MyHello_Prefix.pch and HelloCpp-Info.plist to MyHello-Info.plist.
2. (Xcode) Click the MyHello target and then Build Settings.
3. Search for HelloCpp and rename the Packaging > Info.plist File and Apple LLVM Compiler - Language > Prefix Header to match your renamed files.
Now prove to yourself that it's your own project. Open Classes/HelloWorldScene.cpp and change the following line:
// create and initialize a label
CCLabelTTF* pLabel = CCLabelTTF::create("Hello World", "Arial", 24);
To this:
// create and initialize a label
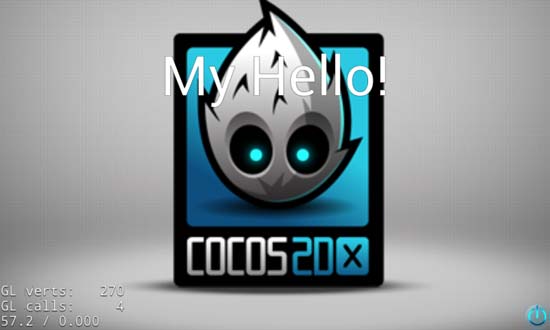
CCLabelTTF* pLabel = CCLabelTTF::create("My Hello!", "Arial", 24);
Now Build & Run your brand new project:

### The Mac Project
One of the best parts about creating a meta-project like this is that it re-uses the same game source code for each platform. Because we changed that one line of code to "My Hello!" it will be applied to every other platform we build for. This is where Cocos2d-X really shines.
Open up the projects/MyHello/proj.mac Xcode project and Build & Run. You'll see your "My Hello!" customization.

That's it for the Mac project. If you like, you can rename it to MyHello as you did for the iOS project above.
### The Android Command-line Project
Once again the meta-project comes in real handy. We already have an Android command-line project that we can customize.
The Android project is targeted for Android API version 8, or Android 2.2 Froyo. This keeps your Android app the most compatible, especially since the Kindle is based on 2.2.
The proj.android folder is mostly ready to go. We just need to add a makefile for convenience. Open Terminal, switch to your MyHello/projects/MyHello/proj.android directory, and create this makefile (or just [download][13] it):
all:
./build_native.sh
ant -Dsdk.dir=/Path/to/your/android/sdk debug
run:
adb -d uninstall org.cocos2dx.hellocpp
adb -d install bin/HelloWorld-debug.apk
adb -d logcat | grep cocos2d
clean:
rm -rf libs/
rm -rf obj/
rm -rf bin/*
rm -rf gen/
rm -rf assets/*
Important: make sure to change the `/Path/to/your/android/sdk` on line 3 to match the path where you installed your Android SDK.
Now, while still in the proj.android directory, you can just run the `make` command to start building your Android APK file:

When the `make` command is done, you'll have HelloWorld-debug.apk ready in the bin subfolder. Because it's a bit tricky to get OpenGL ES 2.0 (used by Cocos2d-X) to [work in the Android Emulator][14], I recommend attaching a real Android device via USB and running it that way.
Once you've attached your Android device via USB, just run the `make run` command, then tap on the HelloCpp app to run it. Here's a screenshot of it running on my Samsung Galaxy S:
If you'd like to rename your Android project, there's several files you'll need to edit. First do `make clean`, then `grep -R HelloWorld *` and `grep -R hellocpp *`.
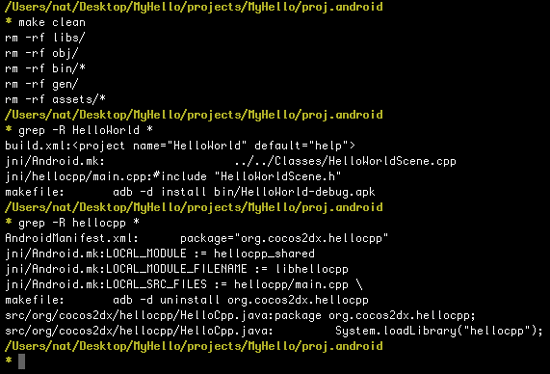
Use that list of files to make your edits and remember to also modify the folder structure of src/org/cocos2dx/hellocpp to your structure (e.g. src/com/yourcompany/yourapp).
### The Android Eclipse Project
Open up Eclipse and make sure you've got all the Android and C++ plugins installed. If you need some guidance getting Eclipse set up correctly, here's a [great tutorial][15].
Now select File > New > Other... and choose "Android Project from Existing Code".
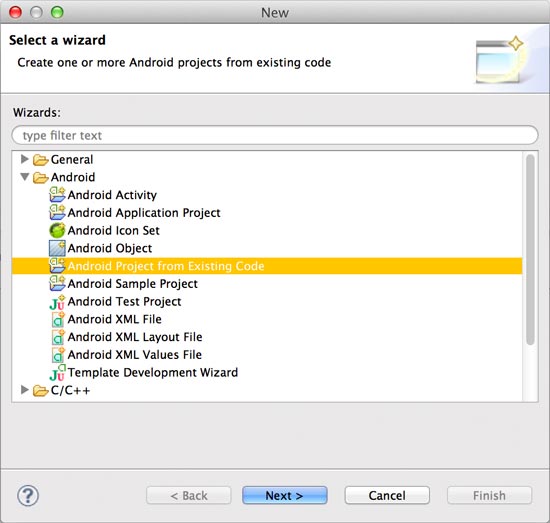
Next, choose your proj.android folder with the Browse... button, make sure your org.cocos2dx.hellocpp project is selected and click Finish.

There you go. You've got org.cocos2dx.hellocpp.HelloCpp in the Package Explorer. Select it, then click the green Play button to launch your app.
If you get errors about @Override and "The method ___ must override a superclass method" then you've got to change your Java compiler compliance level to 1.6. Open Eclipse' preferences to Java > Compiler and select 1.6. Then click "Configure Project Specific Settings..." and do the same for your project.
Wondering where Eclipse stores project file data? It doesn't. Eclipse stores only [workspace data][16].
Note that I don't consider myself an Eclipse expert. Please correct me in the comments if you run into any snags or find a better way to set up your Eclipse projects. I will then update this chapter.
### The Windows Project
The first step here is to get the MyHello project onto a Windows system. I like to just zip up the MyHello directory, reboot my Mac computer into Windows via Boot Camp, then extract all to the Desktop.
Now that you've got the MyHello project on Windows, open up Visual C++ (I'm currently using Visual Studio Express 2010 for this tutorial). Choose File > Open > Project/Solution... and open your `MyHello/projects/proj.win32/HelloCpp.vcxproj`. This will create a new solution with the HelloCpp project.
Next, right click on your solution in the Solution Explorer, choose Add > Existing Project, navigate to your `MyHello/cocos2dx/proj.win32` folder and select `cocos2d.vcxproj`. Repeat the process to add `MyHello/CocosDenshion/` `proj.win32/CocosDenshion.vcxproj`.
Now you have a the HelloCpp solution with the 3 sub-projects:
1. HelloCpp
2. libcocos2d
3. libCocosDenshion
Next we have to set up the solution and project properties.
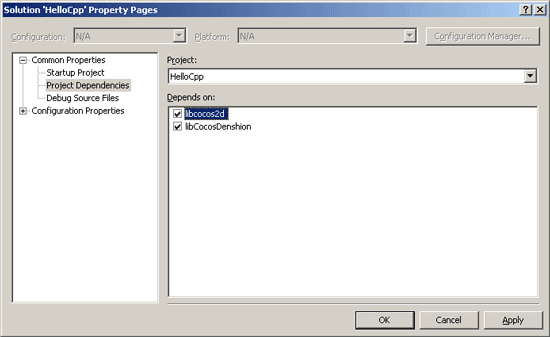
First, right click on the HelloCpp solution (not the HelloCpp project) and choose Properties. Under Common Properties > Project Dependencies, select HelloCpp from the Project drop-down, check the boxes next to libcocos2d and libCocosDension, then click Ok. This will ensure that the libcocos2d and libCocosDenshion projects are built before the HelloCpp project.
Now right click on the HelloCpp project (not the solution) and choose Properties. Select All Configurations from the Configuration drop-down.
Open Configuration Properties > C/C++ > General, edit the Additional Include Directories and change all `$(SolutionDir)` to `$(SolutionDir)..\..\..\`. Click Ok to save and close the properties for the HelloCpp project.

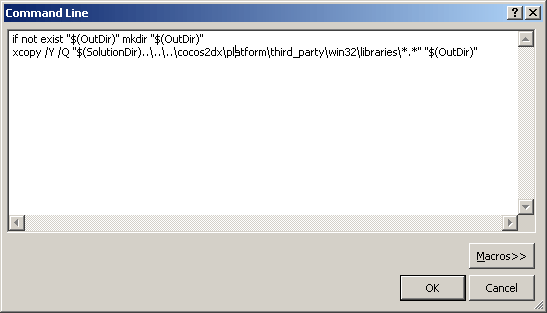
It's a similar process for the libcocos2d project. Right-click it and choose Properties. This time open Configuration Properties > Build Events > Pre-Link Event. Edit the Command Line option and change the `$(SolutionDir)` to `$(SolutionDir)..\..\..\`:
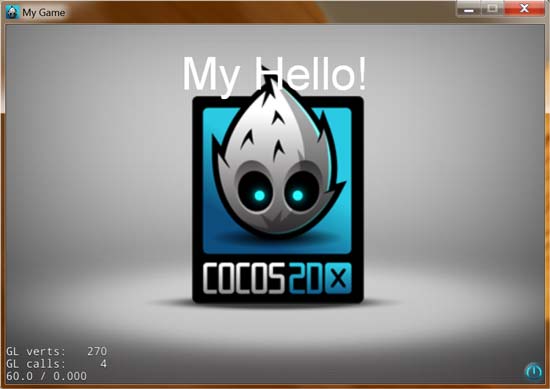
That's it. You now have a Win32 solution ready to go. Just click the green Play icon to Build and Start Debugging.
Here's a screenshot of MyHello running on Windows XP (it also works on Vista, Windows 7 and 8):
### Conclusion
By now you've gone through creating a Cocos2d-X meta-project that builds and runs on iOS, Mac, Android and Windows. Congratulations.
The exciting part about it all is that the same file, HelloWorldScene.cpp, drives most of the content for this little app. Changing that one line from saying "Hello World" to "My Hello!" worked on all those platforms without any further edits.
That's all for this chapter.
[1]: /book/cocos2d-x/project-setup/
[2]: /game-source-code/cocos2d-x-platformer/
[3]: //cocos2d-x.org/download
[4]: //developer.apple.com/xcode/
[5]: //www.microsoft.com/visualstudio/eng/downloads
[6]: //support.apple.com/kb/HT1461
[7]: //developer.android.com/sdk/
[8]: //www.eclipse.org/
[9]: //developer.android.com/tools/sdk/ndk/index.html
[10]: //www.crystax.net/en/android/ndk
[11]: //cocos2d-x.org/boards/6/topics/20138?r=20161
[12]: //www.cocoanetics.com/2011/12/sub-projects-in-xcode/
[13]: /assets/book/cocos2d-x/makefile
[14]: //www.cocos2d-x.org/boards/6/topics/12563
[15]: //www.raywenderlich.com/5527/getting-started-with-android-development
[16]: //forums.adobe.com/message/998187
[17]: /book/cocos2d-x/animation-spritesheets/