There are many ways to make levels for a platformer. In this chapter we'll discuss how to create levels using tilemaps, then use Box2D to bring them to life.
A tilemap level uses an image file subdivided into a grid of tiles. The below screenshot shows a tileset named "Rock" with 16 x 16 pixel tiles.
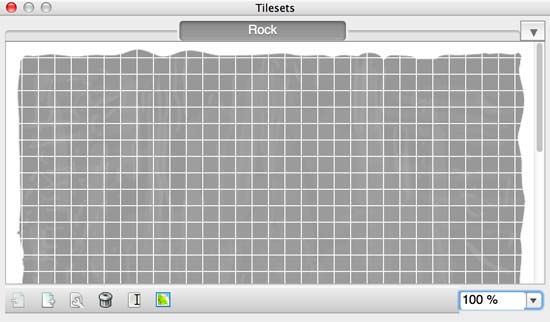
The tiles can be selected from the tileset and drawn to create a tilemap level.
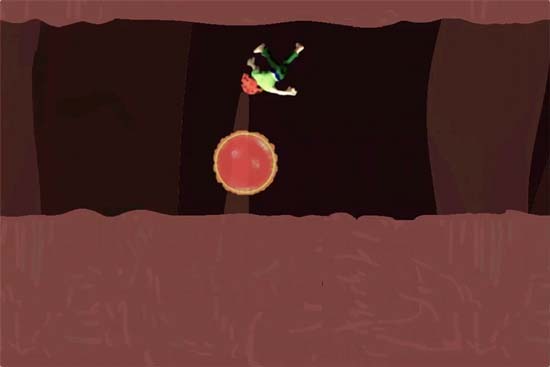
It's possible to use entirely gray tilesets and have the game color each level according to a map property at runtime:
### Tiled Map Editor
The [Tiled map editor][2] is a free, open-source application you can use to draw tilemaps. It uses the .TMX file format, which Cocos2d-X can parse and import into your game.
Download the Tiled editor. It's recommended to grab the latest version available for your system.
Also download the tilemap image file
Rock.png.
### A New TMX Tilemap
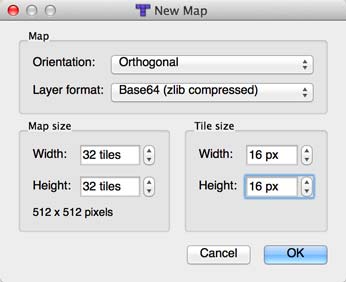
Open the Tiled application and choose New from the File menu. Choose Orthogonal from the Orientation dropdown and "Base64 (zlib compressed)" from the Layer format dropdown. Set the Map size to 32 x 32 and the Tile size to 16 x 16, then click OK.
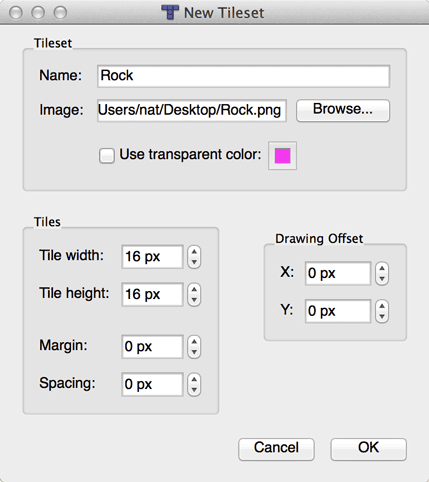
Now let's give it the rock tileset so we have something to draw with. Choose New Tileset from the Map menu, then click Browse button next to Image and choose your copy of Rock.png. It will automatically fill in the name "Rock" for the tileset. Make sure the Tile width and height are 16px and the margin, spacing and offset are 0.
You'll now have the Rock tileset in your Tilesets window. From this window, you can select a single tile or multiple tiles to draw with:

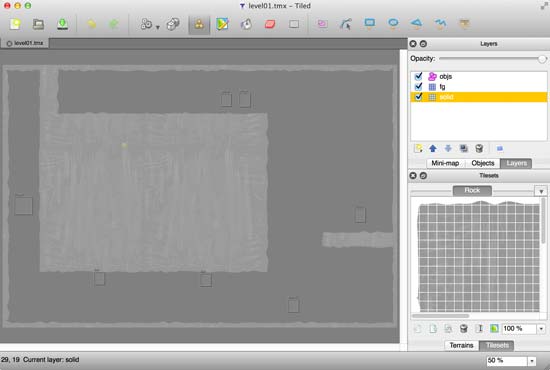
Go back to your main Tiled window and draw your level. You can use the button that looks like a Stamp to draw, the Paint Bucket to fill and the Eraser to erase:

Keep in mind that you can have multiple tilesets per tilemap. However, you have to be careful to draw using a **single tileset per layer**. If you accidentally mix tiles from different tilesets in one layer, you will likely cause a crash when you run your game.
### Objects
When you're finished drawing the level, it's time to add some objects. Objects can be things like the player, enemies, items and other physical things.
Choose Add Object Layer from the Layers menu, then choose the Insert Rectangle tool.

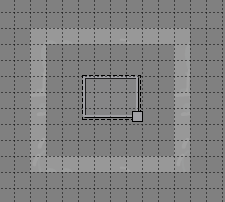
With the Insert Rectangle tool selected, you can click and drag within your tilemap to create a rectangle representing the object's position and area:
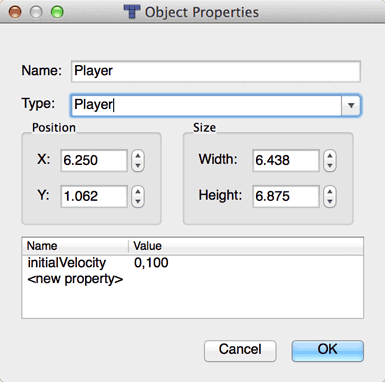
Now that the object has been created, you can choose the Select Objects tool, then right-click on your object to edit its properties. Let's give this object the Name & Type "Player". You can also give your player object additional properties, like initial velocity or whatever you like:
Now save your level file and add it to your game's project.
### TMX into Box2d
Loading a TMX file in Cocos2d-X is as easy as creating a `TMXTiledMap` object:
this->map = TMXTiledMap::create("Level01.tmx");
That will create the map. Behind the scenes, Cocos2d-X loads the TMX file, parses all the tiles, loads the tileset images and parses the object groups.
You can then create a Box2D fixture for each of the tiles to form a physical world that your player can interact with. Note that we will discuss Box2D in further detail in a later chapter of this book.
void Level::prepareLayers()
{
for (auto& object : this->map->getChildren())
{
// is this map child a tile layer?
auto layer = dynamic_cast
(object);
if (layer != nullptr)
this->createFixtures(layer);
}
}
void Level::createFixtures(CCTMXLayer* layer)
{
// create all the rectangular fixtures for each tile
Size layerSize = layer->getLayerSize();
for (int y = 0; y < layerSize.height; y++)
{
for (int x = 0; x < layerSize.width; x++)
{
// create a fixture if this tile has a sprite
auto tileSprite = layer->getTileAt(Point(x, y));
if (tileSprite)
this->createRectangularFixture(layer, x, y, 1.1f, 1.1f);
}
}
}
void Level::createRectangularFixture(TMXLayer* layer, int x, int y, float width, float height)
{
// get position & size
auto p = layer->getPositionAt(Point(x,y));
auto tileSize = this->map->getTileSize();
const float pixelsPerMeter = 32.0f;
// note: creating the 'world' member variable
// is discussed in the next chapter
// create the body
b2BodyDef bodyDef;
bodyDef.type = b2_staticBody;
bodyDef.position.Set(
(p.x + (tileSize.width / 2.0f)) / pixelsPerMeter,
(p.y + (tileSize.height / 2.0f)) / pixelsPerMeter
);
b2Body* body = world->CreateBody(&bodyDef);
// define the shape
b2PolygonShape shape;
shape.SetAsBox(
(tileSize.width / pixelsPerMeter) * 0.5f * width,
(tileSize.width / pixelsPerMeter) * 0.5f * height
);
// create the fixture
b2FixtureDef fixtureDef;
fixtureDef.shape = &shape;
fixtureDef.density = 1.0f;
fixtureDef.friction = 0.3f;
fixtureDef.restitution = 0.0f;
fixtureDef.filter.categoryBits = kFilterCategoryLevel;
fixtureDef.filter.maskBits = 0xffff;
body->CreateFixture(&fixtureDef);
}
That will create a 16x16 static Box2D fixture with a little bit of friction at each position where you drew a tile.
### Creating the Objects
Next it's time to create your game's objects from the object data in the tilemap level.
A `TMXTiledMap` holds a vector of `TMXObjectGroup` objects which subsequently hold value maps representing the properties of the objects. You can turn this data into new objects in your game by looping over the object groups and the objects they hold:
void Level::addObjects()
{
// loop over the object groups in this tmx file
auto objectGroups = map->getObjectGroups();
for (auto& objectGroup : objectGroups)
{
auto objects = objectGroup->getObjects();
for (auto& object : objects)
{
auto properties = object.asValueMap();
auto type = properties.at("type");
if (!type.isNull())
{
this->addObject(type.asString().c_str(), properties);
this->objectCount++;
}
}
}
}
### Multiple Resolutions
Now that we are in the day and age of having to create multiple tiers of art assets for multiple devices, we need a way to turn our SD TMX level file into HD and HDR (HD Retina). Luckily, there's a tool created by WasabiBit called [WBTMXTool][3] which can scale TMX files.
Here's an example that scales level01.tmx by 2.0 and outputs to level01-hd.tmx:
WBTMXTool -in level01.tmx -out level01-hd.tmx -scale 2.0 \
-suffixForHD -hd -suffixAction add
You design your level in SD, then convert up to HD and HDR using the tool.
[1]: /game-source-code/cocos2d-x-platformer-engine/
[2]: //www.mapeditor.org/
[3]: //www.wasabibit.com/wbtmxtool/
[4]: /book/cocos2d-x/box2d-physics/


